Showing posts with label Tutorial. Show all posts

Sunday, September 2, 2012

Tutorial Request: V1nn13z' Special Dress

Ok got this request about my "unique" (and it's not that unique, you could make it yourself) dress. You could say is "unique" since it's a ball dress (the "fancy smancy" dress). I made it like... 4 or 5 months ago (the time where i first open my shop, and after i close down my "House of Blood"). I made several with different color, and people likes it. Here's the example:

The dress I made (one of them)


So here's the tutorial...

        1.The dress

Remember the tutorial about the dress (if you don't, just go to here: http://v1nn13zchitchatcitybadventure.blogspot.com/2012/07/tutorial-how-to-make-skirtdress.html) ? Yeah try to make the same as that...

Try any color you want (I'll try to make a gray dress, since i all ready got black and white, so I'll go with gray this time...) Make it look like this (or similar to this):


Then add try to fix the "upper body" side of the avatar (around the chest to stomach) or just keep it like that (but a dress isn't a turtle-neck):


        2.The rest of it...

Ok this isn't that hard... you just use this (the one that I circled):


And there you go....

Challenge on this is probably the end of it... since it's not that hard, but precision is needed, you can't have it to low, or to high...

Here's one of the finished product:


note: i'm fine if you make a re-make of this, just add me to the credit of making this... and make it your own style, not an exact copy of this


Tuesday, July 31, 2012

Tutorial: How To Make a Skirt/Dress?

Ok... this is MOSTLY are for "new players" since they want a "skirt" not a robe... It's quite easy to make one, you just use the eraser.... but you need to be exact about it... or it'll fail. Here's some easy steps and some tips

Ok since the builder is "new" it's a bit hard to make it, but it's the same as the old builder, just do this:

Put some skin color on the robe, you don't want to be a really really really pale girl around CCC, right?


Done with the skins? Good, now you'll need a base color of your "dress", or your "shirt and the skirt" (lol that rhymed xD). I'll make a dress in this tutorial, but the steps are the same for the shirt and the skirt.


Nice right? Well, it's not finished... It's still the "base" of the dress, and you can't see the feet. now, in this part, you'll have to use the eraser... It's the button on the bottom near the scale. This button is really really annoying, if you do something wrong, it'll delete everything... So be careful, here's some handy tips:

remove this part:


With this:


So you have this:


See, easy right? now you could say this is done... BUT WAIT :O
There's some part missing

You just notice that right??? Yeah... on this part, you might want to add some more... to make it easy actually, use the line shape to fix that "problem"


Now we're talking... this actually done... but if you want to add shoes and stuff, you can actually :D

This is just the basic stuff to make the dress... to make the shirt, just do the same, only... well, it's shirt and skirt... Do the same, and make it look like this


Saturday, July 21, 2012

Tutorial: Car Builder

Sup guys and gals and welcome to another "Tutorial"
On this tutorial, I'll be talking about how to make the cars in CCC, it's really simple to make one... so here we go. Making a car now will cost you 8,000c (it's used to be 10,000c but Matt makes it cheaper)


  • The base...
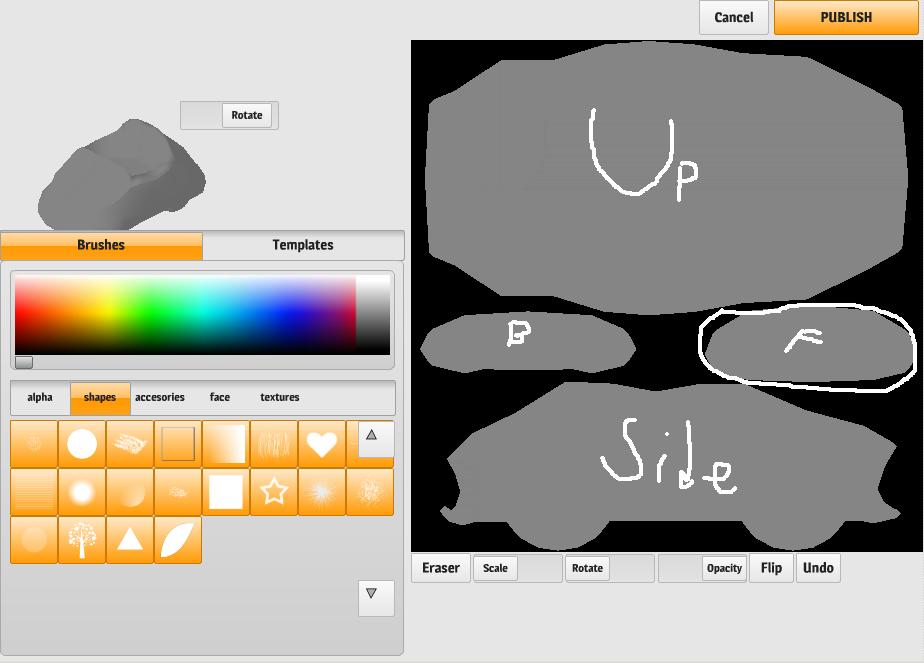
The base is look like this:


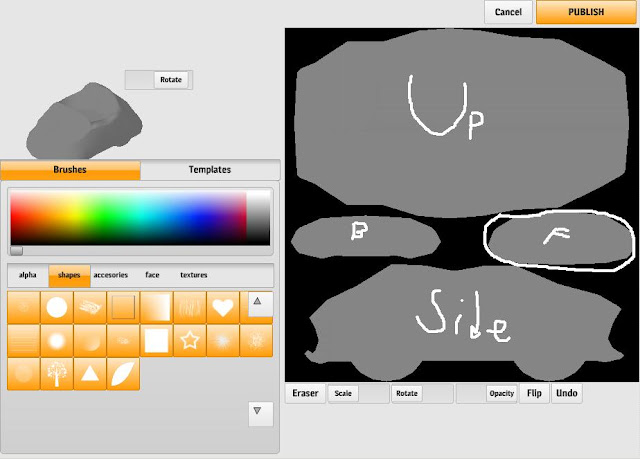
F means Front, B means Back, Up means the upper side, and the Side is of course... the side of the car, it's a bit confusing at first, but you'll get the hang of it, don't worry


  • First thing....
First thing you wanna do is make the seat... now the seat is a bit tricky...
make it so it look likes this:


Ok, if you could see, it's a bit "dirty" you could say, why? because it's a bit over, so try to delete some... Do it till it'll look like this by using the line shape...


If you're done with that, we're ready for the details...


  • The Details....
Ok, first thing you need on this is a theme... well actually before anything you need a theme, right? On this tutorial, my theme will be "Simplicity" which mean something simple, but awesome... In any cars... you need lights, am I right? so let's add the lights...

I'll be using the color dark yellow (it's yellow, but a bit "darker, it's still yellow though). Use the "circle" shape to make the lights (you could use any shapes, but I like to use the circle shape better than using any of the other "color")

After you add the lights, you can add anything you want basically, just don't forget about this:

-The Lights
-The Wheels (or you can make it like a futuristic car... but then you need to delete the wheels [The wheels is the half circle on the side])
-The Windows

Here's the finished product of the car


Well, that's the tutorial folks, Here's some bro-tip (or pro-tip)
  1. Don't over-do it, if you over do it, the car would suck
  2. Always remember that something simple, can be awesome
  3. Don't copy other people, just make something that is your style

Enjoy your day, your life, or your misery
Have fun and stay safe xD


Friday, July 6, 2012

Tutorial: Hair for Girls

Ok... my first tutorial... if someone read this, it's for you that needs to know how to do the "short hair" even though it's not on the builder (next tutorial probably a "how to make a cool car, with a simple stuff).


Ok so... here we go


  • So you choose the "Long" one in the "Head" Category.

  • Try to add a color first (here's mine)

  • Then, try to click on the "Eraser" Button

  • Try to remove some of the "hair" (probably 1/2 or 1/4 of it, depends on the style)

  • Ok... this is the "tricky" part, since it's a bit hard to do it. Try to erase this part:

Erase that


The result
  • Then put some eyes (I recommend if you're still new, use the glasses, to "support" you for the eyes placement)


The "Finished" Face


Ok so... that's how you make the hair.... I'll be posting more "tutorials" from now on... I think
Here's the "finished Stuff"